HOW TO USE A PERCOLATOR? GOOD TIPS AND GUIDES IN 2024.
There’s nothing quite like waking up to the enticing aroma of freshly brewed coffee, and for coffee enthusiasts, the journey to that perfect cup often begins with the classic percolator. As one of the oldest and time-tested methods of brewing coffee, the percolator has a charm that continues to captivate coffee lovers around the world.
In this guide, we’ll delve into the art of using a percolator to brew a robust and flavorful cup of coffee that will awaken your senses and kick-start your day. Whether you’re a seasoned coffee aficionado or a curious novice, mastering the percolator will undoubtedly elevate your coffee experience.
Join us as we explore the ins and outs of percolator brewing, from understanding its components to uncovering the secrets of achieving that perfect balance between aroma, taste, and strength. Get ready to embark on a journey of discovery, where tradition and simplicity come together to create an unparalleled coffee ritual that stands the test of time.
So, grab your favorite coffee beans, gather around the percolator, and let’s unlock the secrets to brewing the perfect cup of joe with this comprehensive guide on how to use a percolator. Your coffee adventure is about to begin!

HOW TO USE A PERCOLATOR?
1. WHAT IS PERCOLATOR?
A percolator is a type of coffee brewing device that has been used for many years to make coffee. It consists of a pot or a chamber with a vertical tube extending from the bottom to the top. The basic principle behind a percolator is the circulation of hot water through coffee grounds to extract the flavors and create a brewed coffee.
Here’s how a percolator typically works:
- Water Reservoir: The lower part of the percolator holds water, which is heated either by a stove or an electric heating element. As the water heats up, it generates steam and pressure.
- Percolator Tube: A vertical tube runs from the bottom of the percolator to the top. At the bottom of the tube, there is a perforated metal or mesh basket that holds the coffee grounds.
- Coffee Grounds: The coffee grounds are placed in the basket above the percolator tube. When hot water rises through the tube, it comes into contact with the coffee grounds, extracting the coffee’s flavor and essential oils.
- Percolation Process: As the water reaches the top of the tube, it typically flows over a spreader or diffuser plate and then cascades down over the coffee grounds, passing through them multiple times. This process continues until the desired strength of coffee is achieved.
- Brewed Coffee: The freshly brewed coffee collects in the upper part of the percolator, ready to be poured and enjoyed.
One characteristic of percolator brewing is that the water repeatedly cycles through the coffee grounds, potentially leading to over-extraction and bitterness if left to brew for too long. As a result, it’s essential to monitor the brewing process carefully and remove the percolator from the heat source at the right moment to achieve a well-balanced and flavorful cup of coffee.
Though percolators have been widely used in the past, they have become less popular in recent years with the rise of other brewing methods like drip coffee makers, espresso machines, and French presses. However, some coffee enthusiasts still enjoy the unique taste and experience that a percolator can provide.
You can see How to Use a Percolator as below.
2. WHAT ARE BENEFITS OF PERCOLATOR?
Percolators have some unique benefits that make them attractive to certain coffee enthusiasts. Here are some advantages of using a percolator:
- Strong and Robust Flavor: Percolators produce a strong and bold coffee flavor. The water repeatedly passes through the coffee grounds, resulting in a robust and intense brew. If you prefer your coffee with a full-bodied taste, a percolator might be a good choice.
- Simplicity: Percolators are relatively simple and straightforward to use. There are no complicated settings or buttons to navigate, making them ideal for those who prefer a more traditional and hands-on coffee brewing method.
- Portable: Percolators are available in various sizes and are often lightweight and portable. They are well-suited for outdoor activities like camping, where you can brew coffee over a campfire or portable stove.
- Easy Maintenance: Percolators are typically easy to clean and maintain. The parts can be disassembled, washed, and reassembled without much hassle.
- No Need for Paper Filters: Unlike some other brewing methods that require disposable paper filters, percolators use a metal or mesh basket to hold the coffee grounds. This means less waste and no need to worry about running out of paper filters.
- Traditional Appeal: For coffee lovers who appreciate the nostalgia and charm of vintage coffee brewing methods, using a percolator can be a delightful experience. It harks back to a time when brewing coffee was an art and a ritual.
While percolators have their benefits, it’s essential to acknowledge that they might not be the best choice for everyone. Due to the recirculation process, percolators can sometimes over-extract the coffee, leading to bitterness.
Additionally, the boiling water can potentially scald the coffee, affecting the overall taste. As a result, some coffee enthusiasts prefer alternative brewing methods that allow for more precise control over water temperature and extraction time.
Ultimately, whether a percolator is the right choice for you depends on your personal preferences and the kind of coffee experience you seek. If you enjoy a bold and robust coffee with a touch of tradition, using a percolator could be a wonderful addition to your coffee brewing repertoire.
You can refer How to Use a Percolator as below.
3. HOW MANY TYPES OF PERCOLATORS?
Percolators come in different types and styles, each with its own unique features and brewing methods. Here are some common types of percolators:
- Stovetop Percolator: This is the traditional and most common type of percolator. It consists of a pot with a percolator tube extending from the bottom to the top. Stovetop percolators are designed to be used on a stove or a heat source, where the water is heated, and the brewing process takes place through the percolator tube.
- Electric Percolator: Electric percolators work similarly to stovetop percolators, but they have an integrated heating element, eliminating the need for an external heat source like a stove. Electric percolators are more convenient and offer better temperature control during the brewing process.
- Camping Percolator: These percolators are specifically designed for outdoor use, such as camping or backpacking trips. They are usually made of lightweight materials and can be used directly over a campfire or a portable stove.
- Glass Percolator: Glass percolators provide a visual brewing experience. They have a glass knob or a section that allows you to observe the brewing process as it happens, making them popular among those who enjoy watching the coffee percolate.
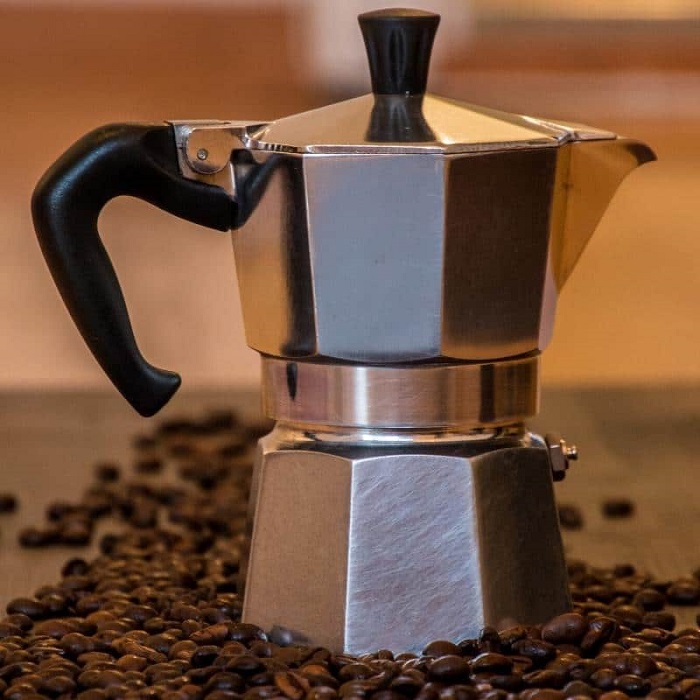
- Moka Pot (Stovetop Espresso Maker): While not a traditional percolator, the Moka pot is often categorized under percolators due to its similar brewing process. It is designed to brew strong, concentrated coffee, often referred to as “stovetop espresso.” Moka pots typically have a two-chamber design, where water is heated in the bottom chamber, and coffee is brewed in the top chamber, passing through a coffee filter basket.
- Automatic Drip Percolator: Some modern coffee makers with percolation-style mechanisms are also available, known as automatic drip percolators. These machines use a percolator-like system to brew coffee, but they may have additional features, such as timers, water reservoirs, and adjustable brewing settings.
It’s worth noting that while the term “percolator” is commonly associated with the stovetop and electric varieties, the definition can sometimes encompass other coffee makers that use a percolation-style brewing process, like Moka pots.
Each type of percolator offers a different coffee brewing experience, so choosing the right one depends on your preferences, needs, and the type of coffee you enjoy.
Please see How to Use a Percolator as abelow.
4. WHAT SHOULD WE CONSIDER BEFORE BUYING A PERCOLATOR?
Before purchasing a percolator, there are several factors to consider ensuring you choose the right one that suits your needs and preferences. Here are some essential considerations:
- Brewing Capacity: Determine how much coffee you need to brew at a time. Percolators come in various sizes, ranging from single-serving options to larger ones suitable for multiple cups. Choose a size that matches your daily coffee consumption or the number of people you typically serve.
- Material and Construction: Percolators are made from different materials, such as stainless steel, aluminum, glass, or ceramic. Stainless steel is durable and easy to clean, while aluminum is lightweight but may not be as sturdy. Glass percolators offer a visual brewing experience. Consider the material that suits your preferences and fits your intended usage, including any potential outdoor activities.
- Heat Source: Decide whether you prefer a stovetop percolator that requires a stove or a heat source, or an electric percolator with an integrated heating element. Stovetop percolators are suitable for traditional brewing, while electric ones offer convenience and better temperature control.
- Brewing Time: Percolators tend to take longer to brew coffee compared to other methods like drip machines or espresso makers. If brewing time is a significant concern for you, consider a percolator with a more efficient brewing process or explore other brewing methods.
- Ease of Use: Look for a percolator with user-friendly features. Check for comfortable handles, easy-to-read water level indicators, and straightforward assembly and disassembly for cleaning.
- Temperature Control: If you opt for a stovetop percolator, consider one with a clear and accurate temperature gauge, as maintaining the right temperature during brewing is crucial to avoid over-extraction and bitterness.
- Filters: Percolators typically use metal or mesh baskets to hold the coffee grounds. Ensure that the percolator you choose has a quality filter basket that effectively prevents coffee grounds from ending up in the final brew.
- Price and Budget: Percolators come in a wide price range, so establish a budget and look for options that offer the features you desire within that range.
- Customer Reviews: Check online reviews and ratings for the percolators you are interested in. Reading feedback from other users can provide valuable insights into the performance, durability, and overall satisfaction with the product.
- Brand Reputation: Consider purchasing from reputable brands with a track record of producing reliable and high-quality coffee makers.
By taking these factors into account, you’ll be better equipped to select a percolator that aligns with your coffee preferences and lifestyle, ensuring that you enjoy a flavorful and satisfying cup of coffee every time you brew.
Please refer How to Use a Percolator as below.
5. HOW TO USE A PERCOLATOR?
Using a percolator to brew coffee is a relatively simple process, but it requires attention to timing and heat control to achieve the desired flavor. Here’s a step-by-step guide on how to use a stovetop percolator:
Note: This guide assumes you are using a stovetop percolator. The process may vary slightly if you have an electric percolator.
Step 1: Gather Your Supplies
- Stovetop percolator
- Coffee grounds (coarsely ground is best for percolators)
- Water
- Heat source (stove or campfire)
Step 2: Add Water
Start by removing the percolator’s lid and the internal components, such as the filter basket and the percolator tube. Fill the bottom chamber with cold water. The amount of water you add should correspond to the number of cups of coffee you want to brew. Be careful not to exceed the maximum capacity of the percolator.
Step 3: Add Coffee Grounds
Place the metal or mesh filter basket onto the percolator tube. Add coarsely ground coffee to the basket. As a general guideline, use approximately one tablespoon of coffee grounds per cup of water. Adjust the amount to your preferred coffee strength.
Step 4: Assemble the Percolator
Put the percolator tube back into the bottom chamber, making sure it fits securely. Attach the lid to the percolator.
Step 5: Heat the Percolator
Place the percolator on the stove or campfire over medium heat. Keep the percolator’s lid open during this stage.
Step 6: Observe the Percolation Process
As the water heats up, it will begin to percolate through the coffee grounds and up the percolator tube. You’ll notice a bubbling sound and see the water change color as it extracts the coffee’s flavor. Keep a close eye on the percolator and the color of the water. Too much time on the heat can lead to over-extraction and bitterness, so it’s essential to monitor the process.
Step 7: Control Brewing Time
The total brewing time can vary depending on the type of coffee, desired strength, and heat intensity. As a general rule, the percolation process typically takes around 5 to 10 minutes. For a milder brew, you can remove the percolator from the heat source after 5 minutes, while a stronger brew may require 8-10 minutes. Experiment with different brewing times to find your ideal flavor.
Step 8: Remove from Heat
Once the coffee has reached your preferred strength, carefully remove the percolator from the heat source. Be cautious, as the percolator will be hot.
Step 9: Let the Coffee Rest
Allow the coffee to sit for a minute or two after removing it from the heat source. This helps the grounds settle at the bottom of the percolator and reduces the chances of over-extraction.
Step 10: Serve and Enjoy
Carefully pour the freshly brewed coffee into your cup and savor the aroma and flavor of your percolator-brewed coffee.
Remember that practice makes perfect. The more you use your percolator, the better you’ll become at mastering the brewing process and achieving the perfect cup of coffee for your taste buds.
There are How to Use a Percolator as above.
6. HOW TO CLEAN A PERCOLATOR?
Properly cleaning a percolator is crucial to maintaining its performance, extending its lifespan, and ensuring that your coffee tastes fresh and flavorful. Here’s a step-by-step guide on how to clean a percolator:
Note: The cleaning process may vary slightly depending on the material and type of percolator you have.
Step 1: Unplug or Cool Down
If you have an electric percolator, make sure to unplug it and allow it to cool down completely before starting the cleaning process.
Step 2: Disassemble the Percolator
Remove all parts of the percolator that can be disassembled. This typically includes the lid, percolator tube, metal or mesh filter basket, and any other removable components.
Step 3: Dispose of Used Coffee Grounds
If there are any used coffee grounds in the filter basket, discard them into the trash or compost bin.
Step 4: Wash Removable Parts
Wash all removable parts with warm soapy water. Use a mild dishwashing detergent to avoid leaving any unwanted flavors in the percolator. You can also use a brush or sponge to scrub away any residue or stains.
Step 5: Rinse Thoroughly
After washing, rinse all parts thoroughly with clean water to ensure no soap residue remains.
Step 6: Clean the Percolator’s Body
For the main body of the percolator, fill it with warm water and add a small amount of baking soda or vinegar. Let the mixture sit for a few minutes to help break down any coffee stains or residue.
Step 7: Scrub the Percolator
Use a non-abrasive sponge or brush to scrub the inside of the percolator gently. Pay close attention to the areas around the percolator tube and the base where coffee oils tend to accumulate.
Step 8: Rinse Again
Once you’ve scrubbed the percolator, thoroughly rinse it with clean water to remove any traces of baking soda or vinegar.
Step 9: Dry Completely
Allow all the parts of the percolator to air dry completely before reassembling it. Make sure there is no moisture left to prevent mold or mildew growth.
Step 10: Reassemble the Percolator
Once all the parts are dry, reassemble the percolator, ensuring that each piece fits snugly and securely.
Step 11: Regular Maintenance
To keep your percolator in optimal condition, consider doing a deeper cleaning at least once a month or more frequently if you use it frequently. This may involve descaling the percolator (especially for electric models) using a mixture of vinegar and water to remove mineral deposits.
By following these cleaning steps and maintaining regular maintenance, you can ensure that your percolator continues to brew excellent coffee and stays in great shape for a long time.
Above is information about How to Use a Percolator. Now, let’s see some tips and guides on How to Use a Percolator as below.
TIPS AND GUIDES ON HOW TO USE A PERCOLATOR.

1. SOME TIPS ON HOW TO USE A PERCOLATOR.
Here are some useful tips to help you get the best results when using a percolator:
- Choose the Right Coffee Grounds: For optimal results, use coarsely ground coffee beans specifically designed for percolators. Avoid finely ground coffee, as it can lead to over-extraction and a bitter taste.
- Measure Coffee and Water: Use the recommended coffee-to-water ratio for your percolator. As a general rule, one tablespoon of coffee grounds per cup of water is a good starting point, but you can adjust it according to your taste preferences.
- Monitor Brewing Time: Pay close attention to the percolation process and avoid over-brewing the coffee. The ideal brewing time is typically between 5 to 10 minutes, depending on your desired coffee strength. Experiment with different times to find your perfect brew.
- Control Heat Intensity: When using a stovetop percolator, adjust the heat to maintain a gentle simmer rather than a rolling boil. Boiling water can lead to scalding and over-extraction, affecting the taste of the coffee.
- Preheat Water: For a faster brewing process, consider using hot water instead of cold water. Preheating the water will reduce the time needed for the coffee to percolate.
- Avoid Reheating Coffee: Once the coffee has finished brewing, avoid reheating it on the stove or leaving it on the heat source. Reheating can lead to over-extraction and result in a less flavorful brew.
- Let the Coffee Rest: After brewing, allow the coffee to rest for a minute or two before serving. This allows the coffee grounds to settle at the bottom, reducing the chances of sediment ending up in your cup.
- Clean Regularly: Properly clean your percolator after each use to prevent coffee residue and oils from building up. Regular cleaning helps maintain the flavor of your coffee and prolongs the life of the percolator.
- Use Fresh Coffee: To ensure the best taste, use freshly roasted coffee beans and grind them just before brewing. Fresh coffee beans contribute to a more aromatic and flavorful cup of coffee.
- Experiment with Coffee Strength: Percolators can produce a range of coffee strengths based on the brewing time and coffee-to-water ratio. Feel free to experiment with different measurements until you find the taste that suits your preferences best.
- Prevent Boiling Over: When brewing on a stovetop, keep an eye on the percolator to prevent boiling over. If you notice it approaching the boiling point, reduce the heat slightly.
By following these tips and adjusting the brewing process to your liking, you’ll be able to enjoy a delightful cup of percolator-brewed coffee that perfectly suits your taste buds.
We introduce How to Use a Percolator as above.
2. DOES A PERCOLATOR NEED TO BOIL?
A percolator does not require the water to reach a full rolling boil during the brewing process. Boiling water is not ideal for percolators, as it can lead to over-extraction and result in a bitter and unpleasant-tasting coffee.
The key to using a percolator successfully is to maintain a gentle simmer rather than a vigorous boil. When the water is heated, it generates steam and pressure, which causes it to rise through the percolator tube and brew the coffee. The percolation process is most effective when the water is at a temperature just below boiling point.
If the water reaches a full rolling boil, the coffee grounds can be over-extracted, leading to bitterness and a burnt taste. Additionally, boiling water may cause the coffee to splash and the percolator to boil over, resulting in a messy and potentially dangerous situation.
To achieve the best results when using a percolator, keep a close eye on the heat source and adjust it as needed to maintain a gentle simmer. This will ensure that the water remains at an appropriate temperature for proper extraction and results in a flavorful and enjoyable cup of coffee.
You can see How to Use a Percolator as above.
3. IS A PERCOLATOR EASY TO USE?
Using a percolator can be relatively easy, especially if you are familiar with basic coffee brewing methods. However, it does require attention to certain details to achieve the best results. Here are some aspects to consider regarding the ease of using a percolator:
Simple Operation: Percolators have a straightforward design with few components. To brew coffee, you need to add water, coffee grounds, and then heat the percolator on a stove or using an electric heating element. The percolation process circulates water through the coffee grounds to extract flavors, and the coffee collects in the upper chamber.
Attention to Timing: The critical aspect of using a percolator lies in timing the brewing process correctly. Over-extracting the coffee by leaving it on the heat source too long can result in a bitter taste. Therefore, you need to monitor the percolation process and remove the percolator from the heat at the right moment.
Heat Control: Stovetop percolators require some attention to heat control. You must adjust the heat to maintain a gentle simmer rather than a rolling boil to avoid over-extraction and scalding.
Cleaning and Maintenance: Cleaning a percolator after each use is essential to keep it in good condition and maintain the quality of your coffee. While disassembling and cleaning the components is relatively simple, it does require regular attention.
Experience and Preference: Like any coffee brewing method, the ease of using a percolator can depend on individual experience and preferences. Some people find percolators easy to use and enjoy the traditional coffee-brewing process, while others may prefer more modern and automated methods.
Learning Curve: If you’re new to using a percolator, there might be a slight learning curve to master the brewing process and timing. However, with practice, you’ll become more comfortable and confident in using the percolator effectively.
Ultimately, the ease of using a percolator can vary from person to person. If you enjoy a hands-on approach to brewing coffee and appreciate the unique flavors a percolator can produce, you may find it relatively easy and enjoyable to use.
However, if you prefer a more automated and precise coffee brewing process, you might opt for other methods like drip coffee makers or espresso machines.
You can refer How to Use a Percolator as above.
4. WHY DON T PEOPLE USE PERCOLATORS ANYMORE?
The use of percolators has declined in recent years for several reasons. While some people still enjoy the traditional brewing method of percolators, other coffee brewing technologies and preferences have gained popularity, leading to a decrease in their widespread use. Here are some factors contributing to the decline in percolator usage:
- Taste Preference: Percolators can produce a strong and robust coffee flavor, which may not be to everyone’s liking. Many coffee enthusiasts now prefer other brewing methods, such as pour-over, French press, or espresso machines, which offer more control over the extraction process and can produce a milder and more nuanced cup of coffee.
- Brewing Control: Percolators have limited control over the brewing process. The recirculation of water through the coffee grounds can lead to over-extraction, resulting in bitter coffee if not closely monitored. Other brewing methods, like pour-over and espresso machines, allow for precise control over factors such as water temperature, brewing time, and water flow, resulting in a more customized cup of coffee.
- Convenience and Automation: Modern coffee makers, such as drip coffee machines and single-serve pod systems, offer convenience and automation, requiring minimal effort from the user. Many people value the ease of these machines, which often come with programmable timers and automatic shut-off features.
- Specialty Coffee Culture: The rise of specialty coffee culture has introduced consumers to a wide range of coffee brewing techniques and high-quality beans. As people become more interested in exploring different coffee flavors and profiles, they often gravitate toward brewing methods that highlight the unique characteristics of the beans.
- Versatility: Percolators are primarily designed for brewing coffee, and their functionality is limited to this purpose. Many people now prefer multi-functional coffee machines that can brew various types of coffee, including espresso-based drinks like lattes and cappuccinos.
- Evolving Coffee Trends: Coffee trends continually change, and new brewing methods and equipment often capture the attention of consumers. Pour-over, cold brew, and immersion methods have become trendy alternatives to the traditional percolator.
- Improved Alternatives: Modern coffee makers have evolved to address the limitations of traditional percolators. Drip coffee machines now offer better temperature control and water distribution, ensuring a more consistent brewing process and flavor profile.
Despite the decline in popularity, percolators still have a devoted following among those who appreciate the nostalgia, simplicity, and bold flavor they can produce. In the end, the choice of coffee brewing method is subjective and depends on individual preferences and tastes.
Please see How to Use a Percolator as above.
5. WHAT IS THE DISADVANTAGE OF A PERCOLATOR?
While percolators have their merits and can produce a bold and robust cup of coffee, they also come with some disadvantages that may make them less appealing to certain coffee enthusiasts. Here are some of the drawbacks of using a percolator:
- Over-Extraction and Bitterness: Percolators work by recirculating hot water through the coffee grounds, which can lead to over-extraction if left to brew for too long. Over-extraction can result in a bitter and unpleasant-tasting coffee, especially if the brewing time is not closely monitored.
- Lack of Brewing Control: Percolators offer limited control over the brewing process. Unlike other methods like pour-over or espresso machines, where you can adjust factors like water temperature and flow, percolators have fewer variables to control, making it challenging to fine-tune the taste to individual preferences.
- Sediment in Coffee: Percolators may allow some fine coffee grounds to pass through the metal or mesh filter basket, resulting in sediment in the final cup. This can affect the smoothness and clarity of the coffee.
- Uneven Extraction: The recirculation process in percolators may lead to uneven extraction, where some coffee grounds receive more exposure to hot water than others. This can result in a less consistent flavor profile in the brewed coffee.
- Time-Consuming: Compared to more modern brewing methods like drip coffee makers or single-serve machines, percolators can be relatively time-consuming. The brewing process can take several minutes, and you need to pay close attention to timing to avoid over-extraction.
- Limited Versatility: Percolators are primarily designed for brewing coffee, and they are not suitable for making other coffee beverages like espresso, cappuccino, or latte.
- Cleaning and Maintenance: While cleaning a percolator is relatively straightforward, it does require regular attention to prevent coffee oils and residue from building up over time.
- Not Ideal for Specialty Coffee Beans: Percolators may not be the best choice for showcasing the delicate flavors and nuances of specialty coffee beans. The bold and robust brewing method may overpower the unique characteristics of high-quality beans.
- Not Suitable for Small Batch Brewing: Percolators are typically designed for brewing larger quantities of coffee. If you prefer to brew single cups or smaller batches, other brewing methods might be more suitable.
Despite these disadvantages, many coffee enthusiasts still enjoy using percolators for their simplicity, nostalgic appeal, and the bold coffee flavor they produce. Ultimately, the choice of coffee brewing method depends on individual preferences and the type of coffee experience you seek.
Please refer How to Use a Percolator as above.
6. IS A PERCOLATOR STRONGER THAN FRENCH PRESS?
In terms of coffee strength, the brewing strength of a percolator and a French press can be quite similar, but there are some key differences in the flavor profile and brewing method that might influence how they are perceived.
- Flavor Profile:
- Percolator: Percolators tend to produce a strong and robust coffee flavor. The recirculation process of hot water through the coffee grounds can lead to a bold and intense cup of coffee, which some people might find stronger in taste.
- French Press: French press coffee is known for its full-bodied and rich flavor. It extracts more oils and solids from the coffee grounds compared to other methods, resulting in a coffee that is bold and flavorful.
- Brewing Method:
- Percolator: Percolators recirculate water through the coffee grounds multiple times, which can result in some over-extraction if the brewing time is not carefully monitored. This may lead to bitterness in the coffee.
- French Press: In a French press, coffee grounds steep in hot water for a few minutes before being separated by pressing a mesh filter. The steeping process extracts the coffee’s flavors without repeated exposure, offering a more controlled brewing method.
- Coffee-to-Water Ratio: The strength of the coffee in both methods can be adjusted by controlling the coffee-to-water ratio. In a percolator, you can experiment with the amount of coffee grounds used, while in a French press, the strength can be adjusted by varying the amount of coffee and the steeping time.
- Sediment: French press coffee typically has more sediment compared to percolator coffee. Some people prefer the texture and mouthfeel that sediment adds to the coffee, while others might find it less desirable.
In summary, both percolators and French press can produce strong and flavorful coffee, but the flavor profile and brewing methods have some distinctions. Whether one is “stronger” than the other can vary based on individual taste preferences.
Some coffee lovers enjoy the boldness of percolator coffee, while others appreciate the rich and full-bodied experience of French press coffee. The best way to find out which method you prefer is to try both and see which one suits your taste buds and brewing preferences.
There are How to Use a Percolator as above.
7. SOME COFFEE RECIPES FOR PERCOLATOR.
Here are a few coffee recipes you can try using a percolator:
- Classic Percolator Coffee:
- Water: Fill the percolator’s water chamber with cold water according to the number of cups you want to brew.
- Coffee Grounds: Add coarsely ground coffee to the metal or mesh filter basket. Use approximately 1 tablespoon of coffee grounds per cup of water.
- Brewing: Assemble the percolator and place it on the stove over medium heat. Keep an eye on the percolation process and remove the percolator from the heat source after 5 to 10 minutes, depending on your desired coffee strength. Let it rest for a minute before serving. Add milk and sweeteners, if desired.
- Spiced Percolator Coffee:
- Water: Fill the percolator’s water chamber with cold water according to the number of cups you want to brew.
- Coffee Grounds: Add coarsely ground coffee to the filter basket.
- Spices: For every 4 cups of water, add 4-5 whole cloves, 1 cinnamon stick, and 4-5 crushed cardamom pods to the water chamber.
- Brewing: Assemble the percolator and place it on the stove. Follow the standard brewing process, allowing the water to circulate through the spices and coffee grounds. Once brewed, strain the coffee to remove the spices before serving.
- Vanilla Maple Latte:
- Water: Fill the percolator’s water chamber with cold water according to the number of cups you want to brew.
- Coffee Grounds: Add coarsely ground coffee to the filter basket.
- Latte Ingredients: In a separate saucepan, warm milk and add a splash of vanilla extract and a drizzle of maple syrup to taste. Froth the milk using a milk frother or whisk until it becomes frothy.
- Brewing: Brew the coffee using the percolator. Once brewed, pour the coffee into a mug and top it with the frothed vanilla maple milk.
- Iced Percolator Coffee:
- Water: Fill the percolator’s water chamber with cold water according to the number of cups you want to brew.
- Coffee Grounds: Add coarsely ground coffee to the filter basket.
- Brewing: Brew the coffee using the percolator and let it cool to room temperature. Once cooled, transfer the coffee to a pitcher and refrigerate until chilled.
- Serving: Fill glasses with ice and pour the chilled coffee over the ice. Add milk or sweeteners to taste, if desired.
These recipes can be adjusted based on your taste preferences and the size of your percolator. Enjoy experimenting with different flavors and combinations to create your perfect cup of percolator-brewed coffee!
We introduce How to Use a Percolator as above.
8. COMMON MISTAKES ON HOW TO USE A PERCOLATOR.
Using a percolator may seem simple, but there are some common mistakes that people can make on How to Use a Percolator. Here are some of the most common mistakes to avoid when using a percolator:
- Boiling the Water: One of the most significant mistakes is allowing the water to reach a rolling boil. Boiling water can lead to over-extraction and bitterness in the coffee. Instead, maintain a gentle simmer to keep the brewing process at the right temperature.
- Over-Brewing: Allowing the coffee to brew for too long can result in over-extraction, making the coffee taste bitter and unpleasant. It’s essential to monitor the brewing time closely and remove the percolator from the heat source when the coffee reaches the desired strength.
- Using Fine Coffee Grounds: Using finely ground coffee can lead to over-extraction, as the smaller particles extract faster. Stick to coarsely ground coffee specifically designed for percolators to achieve the best flavor.
- Neglecting Cleaning: Proper cleaning and maintenance are crucial to ensure the percolator performs optimally and to prevent any coffee residue or oils from affecting the taste of future brews. Regularly clean all parts of the percolator after each use.
- Overfilling the Percolator: Overfilling the water chamber or using too many coffee grounds can cause the percolator to boil over or produce weak coffee. Follow the recommended water-to-coffee ratio for the best results.
- Ignoring Heat Control: Not paying attention to heat control can lead to inconsistent brewing. Adjust the heat to maintain a gentle simmer rather than a rolling boil for better control over the extraction process.
- Reheating Coffee: Reheating coffee in the percolator can lead to over-extraction and a bitter taste. It’s best to brew only the amount of coffee you plan to consume immediately.
- Using Low-Quality Coffee: The quality of the coffee beans significantly impacts the flavor of the brew. Using low-quality or stale coffee beans can result in an unsatisfying cup of coffee, regardless of the brewing method.
- Not Letting Coffee Rest: After brewing, allow the coffee to rest for a minute or two to let the coffee grounds settle before serving. This can help reduce sediment in the final cup.
- Using the Wrong Grind Size: Make sure to use the correct grind size for your percolator. Using the wrong grind size can affect the extraction process and lead to undesirable coffee flavors.
By avoiding these common mistakes, you can improve your percolator brewing skills and enjoy a delicious and flavorful cup of coffee every time.
You can see How to Use a Percolator as above.
FAQS ABOUT HOW TO USE A PERCOLATOR.

1. Question 1: How much coffee should I use in a percolator?
A: The recommended coffee-to-water ratio for a percolator is about 1 tablespoon of coarsely ground coffee per cup of water. Adjust the amount of coffee grounds based on your taste preferences and the desired coffee strength.
2. Question 2: How long should I let the coffee brew in a percolator?
A: The brewing time can vary depending on your desired coffee strength and the size of the percolator. As a general guideline, brewing usually takes between 5 to 10 minutes. It’s essential to monitor the percolation process and remove the percolator from the heat source promptly to avoid over-extraction and bitterness.
You can refer How to Use a Percolator as above.
3. Question 3: Can I use fine coffee grounds in a percolator?
A: It’s best to use coarsely ground coffee specifically designed for percolators. Fine coffee grounds can lead to over-extraction and produce a bitter taste in the coffee.
4. Question 4: Should I let the water come to a full boil in a percolator?
A: No, boiling water is not ideal for percolators. Maintain a gentle simmer to keep the brewing temperature at the right level. Boiling water can lead to over-extraction and negatively affect the coffee’s flavor.
Please see How to Use a Percolator as above.
5. Question 5: Can I reheat coffee in a percolator?
A: Reheating coffee in a percolator can lead to over-extraction and bitterness. It’s best to brew only the amount of coffee you plan to consume immediately.
6. Question 6: How often should I clean my percolator?
A: It’s essential to clean your percolator after each use to prevent coffee residue and oils from affecting the taste of future brews. Additionally, consider doing a deeper cleaning and descaling at least once a month to maintain optimal performance.
There are How to Use a Percolator as above.
CONCLUSION.
In conclusion, How to Use a Percolator? Using a percolator can be a delightful and rewarding experience for coffee enthusiasts seeking a bold and robust cup of coffee. While the process of brewing with a percolator is relatively simple, it requires attention to timing, heat control, and coffee-to-water ratios to achieve the best results.
Avoiding common mistakes, such as over-brewing, using fine coffee grounds, or boiling water, is essential to ensure a flavorful and satisfying coffee.
Despite the decline in popularity due to the emergence of more modern and automated coffee brewing methods, percolators continue to hold a special place in the hearts of those who appreciate the nostalgic charm and rich coffee flavor they can produce.
With proper care and maintenance, a percolator can become a reliable companion, brewing delightful cups of coffee for years to come.
Whether you prefer the traditional brewing style of a percolator or explore other brewing methods, the world of coffee offers a diverse range of experiences and flavors to suit every coffee lover’s preferences.
Embrace the joy of brewing, experiment with different recipes, and savor each cup as you embark on your coffee journey, discovering the delightful nuances of this beloved beverage. Happy brewing!
Read more:
Top 8 Best Espresso Machine Under 200 Reviews in 2024